Whether you use them or not, having the right tools for any job is a key to being a responsible homeowner.
By Caleb MacLean
One day this past spring an unfamiliar urge swept over me as I glanced up at the side of my old, wood-shingled home. One of the two local woodpecker kabbalahs (I think it was the smaller downy woodpecker) had taken a shine to our siding and punched a series of perfectly round holes above our second-story bedroom window. Presumably the birds were hearing something on the other side of the shingles that they assumed were bugs. Since I often experienced their pecking while watching Morning Joe before work, I think what they were hearing was Mika Brzezinski stressing out about President Trump.
Anyway, on this particular day I decided enough was enough…I was going to yank out the damaged shingles and replace them myself. I would not call a professional.
 I mean, how hard could it be?
It was hard.
I knew having the right tools was important, although I wasn’t sure exactly which tools this job required. I dug out our toolbox and searched the Internet for some instructional clips on replacing damaged shingles. The tools in my box looked enough like what the guys in the videos were using. Next, I needed a good ladder.
About a week later my ladder arrived via UPS—nothing like striking while the iron is hot, right?
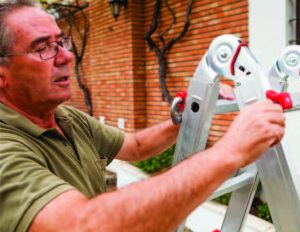
I had ordered one of those Little Giant contraptions you see advertised on late-night TV. It did so many jobs and, even though none of those jobs were ones I was likely to perform, I’m all about versatility. So 200-plus dollars later I unboxed my new ladder, read the instructions carefully and then came within a half-inch of losing my pinkie trying to unfold it. I re-read the instructions (oh, okay, I see) and did it correctly this time. With my toolbox at the ready, I maneuvered the ladder under the first hole, tilted it up against the house…and realized that it was five feet short of what I needed.
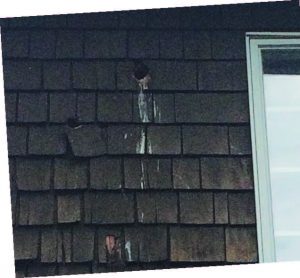 Starlings soon moved into the woodpecker holes, raised their noisy children, and defecated all over the side of the house. I think some kind of bees are in there now.
This is not a story about buying the wrong ladder. I can (and may very well) write a book on the subject if I manage to keep all 10 fingers intact. It’s about the things every man—handy or, like me, un-handy—needs in his toolbox. I am being gender-specific here not out of laziness or chauvinism, but because the women I know would already have found a better version of this article and assembled a great toolbox. Or called a professional long before the wildlife assault had transitioned into an infestation.
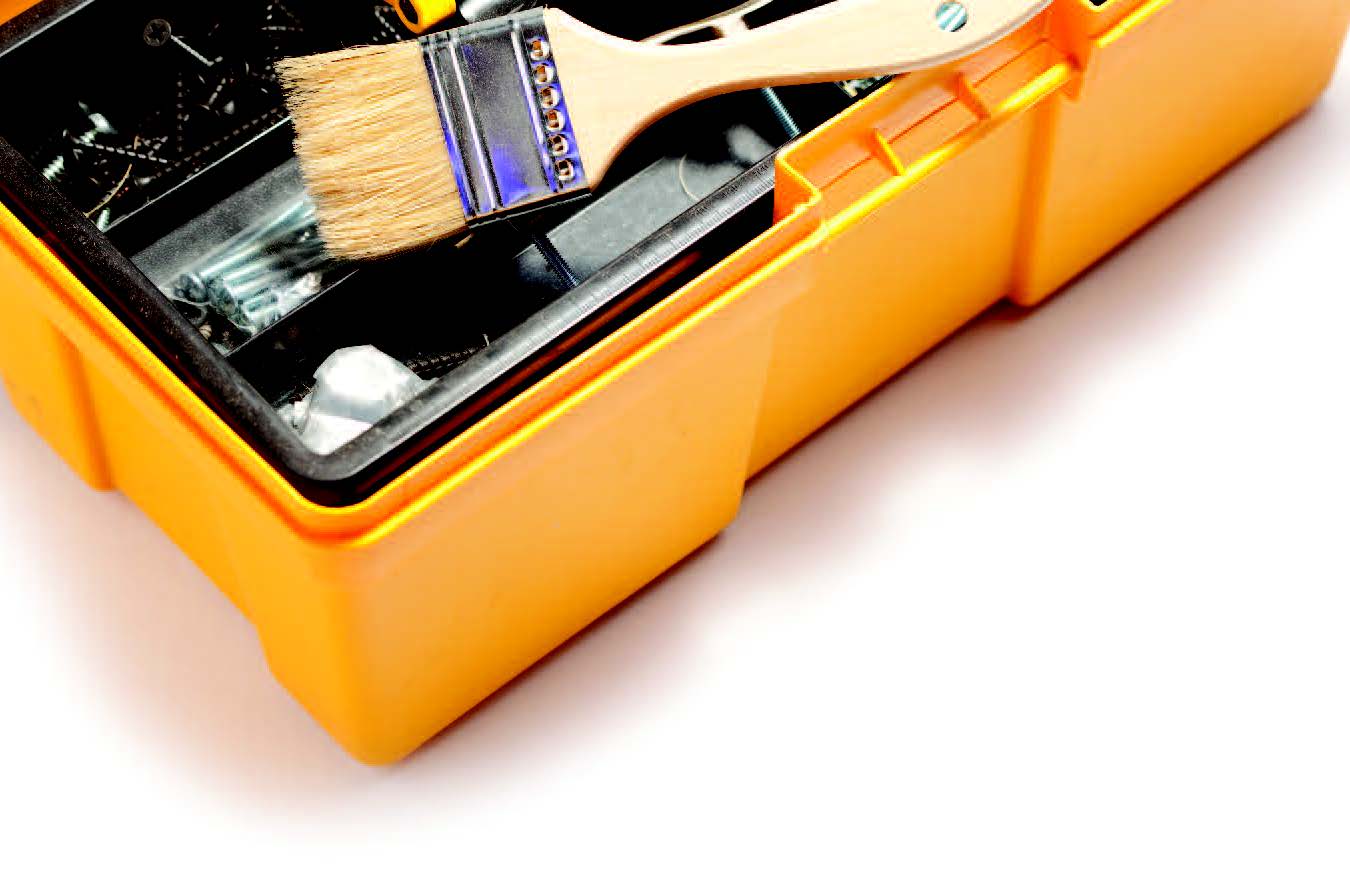
What do you absolutely, positively need in a toolbox? As an amateur repairman with a hard emphasis on amateur, I have managed over the better part of four decades to assemble a pretty good one. If you’ve covered the basics with quality equipment, you should be able to tackle almost any project that doesn’t involve water or electricity. So let’s take a peek inside and see what you’ve got, and what you might still need…
SCREWDRIVERS
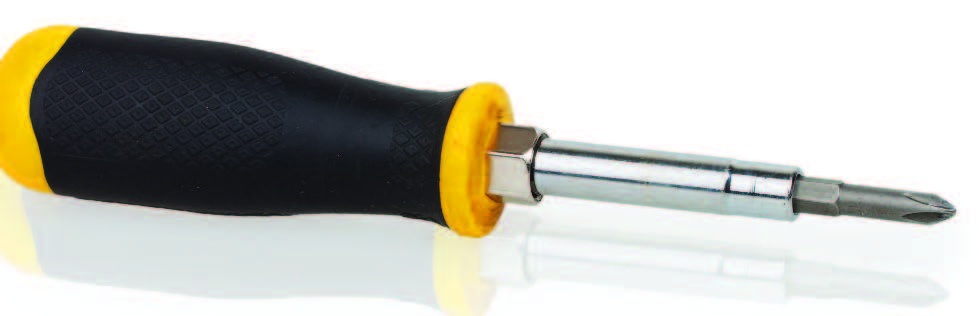 There are four basic types of screwdrivers: slotted, Phillips, square drive and precision. You should have a variety of sizes, including a couple with extra-long shafts. The market is flooded with inexpensive sets made of poor-quality metal and, speaking from experience, I’ll just say that you get what you pay for. Over the years, I can’t tell you how many screwdrivers I have dulled or destroyed wrestling with uncooperative screws. Sometimes the screws are made of inferior metal, which is even more infuriating.
If you do feel like buying a cheap screwdriver, grab one of those 4-in-1 jobs you often see in the impulse-purchase section of your local hardware store for $5. You know the ones I’m talking about: they have two flat-heads and two Phillips heads, and you can pop them out of the handle and spin the shaft around to get the head you need. Go ahead and buy three because a) a little bit of torque can render them useless and b) like scissors and socks, they tend to vanish. I also like to have a couple of sets of those L-shaped Allen wrenches in my box. I keep them on a keychain. I know they are called wrenches, but to me they are screwdrivers. Technically, they are called hex keys.
I’ve always wondered which came first—the Phillips screw or the Phillips head screwdriver. This may be more of a philosophical debate than a technical one. I imagine they were equal parts of the same burst of inspiration. What I do know is that the Phillips screw is favored by manufacturers because it is self-centering. And I recently learned that neither the screw nor the screwdriver was invented by Phillips. John P. Thompson came up with the idea during the Depression and sold it to Henry F. Phillips, who added a couple of tweaks and then convinced GM to use his screws in its Cadillac production line. Next I’m sure you’re wondering, did Allen invent the Allen wrench? Yes! Just over a century ago, the Allen Manufacturing Company came up with a recessed “safety” screw that required its special wrench to tighten and untighten. Allen sold the patent to a company called Apex Tool Group. Apparently, Apex is slowly being driven mad by the fact that people won’t stop calling their tool by another company’s name.
HAMMERS
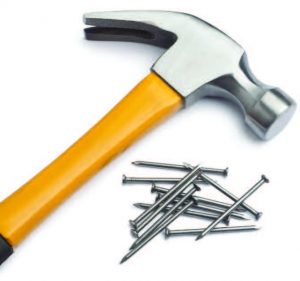 If you ask my wife, who does all the picture-hanging in our home, my recommendation for hammers would be a wide assortment of sizes and weights with rusty heads and deteriorating wooden handles. That is because I’ve been hiding the good ones from her. And by good ones I mean the $20 beauty I purchased after my Chinese-made, fiberglass-handled hammer literally broke in half while I was prying a long nail our of an old table. So here is what I have to say about hammers: Buy one made from a single piece of steel, not too light, not too heavy—about a pound give or take an ounce—with a curved claw for basic nail removal. A $20 to $30 hammer should also have a fairly ergonomic grip and will feel balanced in your hand. Balance is the key to good aim, i.e. hitting the nail on the head and not your thumb. The striking surface should be about an inch wide.
Some jobs (like my shingle experiment) may require different types and weights of hammer. Most people add them as they go. Eventually, you’ll probably want to have a club hammer and a pin hammer. A club hammer has a short handle and heavy head. It’s good for demolition projects and is also good for tapping a chisel. A light pin hammer can be used for small carpentry jobs and things like repairing picture frames. Two hammers you probably recognize, but are unlikely to need, are a ball peen hammer and a roofing hammer. Ball peen hammers (the “peen” is the non-striking side of the head) are a throwback to when regular people worked with metal. That’s no longer a thing. A roofing hammer is shaped to do a couple of jobs you’ll only need to do on a roof. It has a “spiked peen.” I hear there’s a pill for that now.
TAPE MEASURE
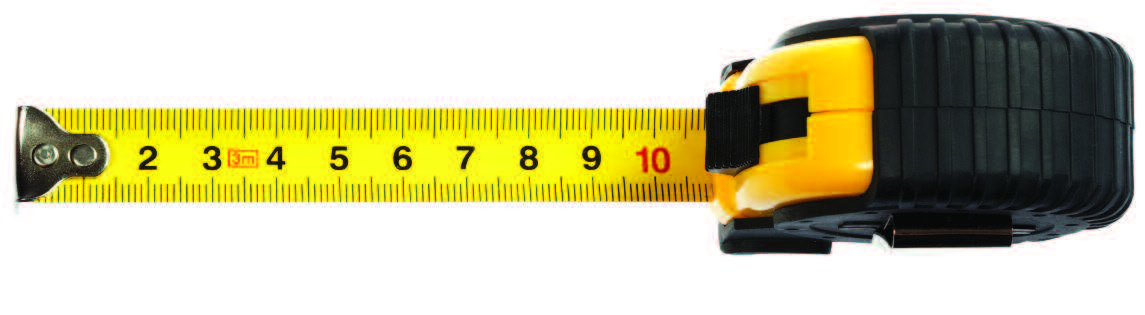 Like a good hammer, a high-quality tape measure will run you between 20 and 30 bucks. For most folks, a 25-footer will do. Of course, whatever length you buy, you’ll soon need to measure something two feet longer, but that’s a life problem, not a tool problem. Most contractors like a tape measure that locks and unlocks easily, and “stands out” at least six feet—meaning it won’t collapse down when held straight out in the air. If you can find one with a magnetic hook, that’s a plus since you’ll probably be working alone. Obviously, you want to make sure your tape measure has easily read feet, inches, centimeters and meters. It should be shockproof and heavy-duty because you will drop it again and again and again. Look for some kind of replacement guarantee from the manufacturer.
DRILLS
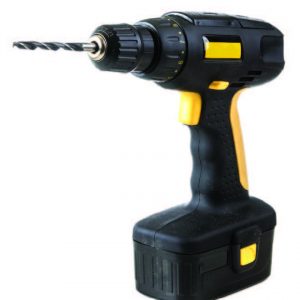 We used to own a drill that worked beautifully up to a point. It was fine for boring the myriad holes a homeowner requires, even through old lathework and knots in wood. Where it sometimes fell short was when we were using it to screw or unscrew something. It was just too big and too heavy. It was difficult to keep on a consistent 90-degree angle, and when it encountered a stubborn screw it torqued my arthritic wrist and elbow violently. I am no expert with a drill, but I can say that the next one I buy will be lighter and more compact without sacrificing power. I suggest you do the same.
As we near that day, I’ll also have to decide between corded or cordless. Cordless seems like a no-brainer, but it’s a little tricky figuring out how much work you can do on a single charge. I would check ratings and comments from previous customers and testing services. Also, in my case, I am congenitally incapable of remembering which little converter goes with which small appliance. Fortunately, we have no end of grounded outlets inside and outside our home (thank you, obsessive former owner) so I’ve felt no pressing need to cut the cord. As for drill bits, buy two sets (one high-quality, the other inexpensive) because you’ll probably lose the one bit you desperately need on a Sunday evening when everything is closed.
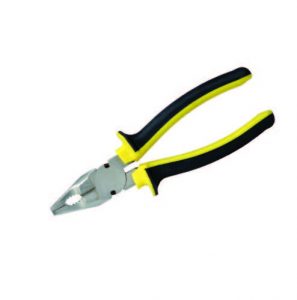 PLIERS
There are three basic types of pliers everyone should have in their toolbox: vise-grips, needle-nose and old reliable adjustables. Vise-grip (aka locking) pliers are ideal for multiple tasks. Because the adjustment mechanism is identical on all brands, the main point of differentiation being is the ease with which the pliers lock and, more importantly, unlock. Don’t be afraid to test them out and you’ll see the difference. Needle-nose pliers are ideal for twisting tasks or grabbing hold of things your fingers can’t. They also double as wire-cutters. Pick a pair that open and close smoothly, and that feel comfortable in your hand. A good pair will run you $10 to $20. Definitely spend the money for a great pair of adjustable pliers. You’re looking for quality, durability, comfort and ease of use. Go with a push-button model if you can find one and avoid pliers that are over 10 inches long.
OTHER STUFF
 You should definitely have a utility knife in your toolbox. Not a box-cutter, but a multifunction utility knife. It should feel good and safe in your hand. If a sliding blade makes you nervous, you can buy ones that fold up like a pocketknife, and vice-versa. Changing blades after a couple of jobs is a must, so make sure that you have a good supply and that swapping them out is simple. Just as important is a high-quality pry-bar. Besides pulling out nails, tacks and other items, it can help un-stick doors, windows and anything else that’s been painted over.
I recently installed a wall mount for a 46-inch flatscreen without a stud finder. That’s because the stud was me!
 Of course, I might just as easily have destroyed the wall, the TV and the Stickley bookcase underneath it—all because I lacked a $5 gadget. A stud finder uses a magnet to locate the screws used to fasten the sheetrock to the vertical studs. I used the old tap-tap-tap method. Use the stud finder because there is a fine line between stud and moron.
I did use a level for the TV project. Unfortunately, it was one of those free apps you download onto your iPhone. We reside in an older home that’s not exactly plumb, so I feel as if I didn’t get the wall mount exactly straight. Fortunately, the manufacturer included an adjustment screw on the mount itself. In my defense, my only other option was to use a level that was over a foot long and just too cumbersome. For my next project I think I will either add a laser level, which I’ve used with success as a volunteer outside my home, or a standard torpedo level.
Like most homeowners, I’ve got a hodgepodge of other items in my toolbox. Mostly weird things I’ve purchased on impulse or in anticipation of some project I’ll never get to. To many, buying a specialized tool for a specific project is half the fun. For me it’s half the battle. My feeling is why not fight the other half of the battle later (or never)?
THE BOX
Finally, just as there is always a right tool for the job, there is a right toolbox for the tools you own. Car guys have those great big red rolling carts. Masons, carpenters and electricians certainly have their own specialized equipment carriers. For Joe Homeowner, there are some basic rules to follow.
First, don’t buy anything plastic. These toolboxes are usually priced to sell and often look like a reject from the Transformers movies. After a certain amount of abuse, they just don’t hold up well. Also, if you want to be truly serious about home repair, by all means avoid the pre-packed, ready-to-go tool kits that come in their own snap-shut carrying case. If buying every tool you’ll ever need for $50 or $75 seems too good to be true, trust your judgment. It is. Unless you’re just starting adult life or are living in a dorm or studio apartment, bite the bullet and make a modest investment. A good, metal toolbox filled with the basic high-quality products required to do the bulk of home fix-it projects, is likely to run between $300 and $500.
As for me, I’ve probably invested somewhere in between those two figures and except for the 22-foot ladder that needed to be 27 feet, I feel adequately equipped to go to war with anything between my roof and my basement. There are some wrenches in my toolbox, so I can even do some minor plumbing.
Regarding the woodpecker issue, however, I decided to call a professional to plug my holes and repair my shingling. I’m not sure which creature in the nearby woods is eyeing these openings as a potential domicile, but I have no interest in finding out. For the record, I do plan to get my money’s worth out of the Little Giant. When the shingle guy gets here, I will configure the ladder so that I can use it as a bench. Which I will use to watch someone qualified fix my house.
WHAT’S IN MY BOX?
Dennis Corcoran • HG Edwards
- Which tool is worth spending the extra money on for the very best quality?
- We work with replacement windows and doors, so for us it’s the Multi Master Oscillating Saw. The saw vibrates and oscillates, allowing for precise cuts that are not feasible with traditional circular saws.
- What’s the one tool you’d never leave home without?
- A sturdy tape measure, like a Stanley Powerlock 16′. Windows are typically made to order, and are not returnable. When ordering windows, the first step—getting accurate dimensions—is the most important. Measure twice, cut once…because you can’t cut the window!
- What tool is most dangerous in the hands of an amateur?
- Circular hand and table saws. They need to be used with caution, and should not be used at all without the safety shields and guards provided. Proper training is essential, but many accidents still happen among experienced installers and carpenters due to carelessness. Many a finger has been lost to circular saws due to laziness or carelessness. Think before each cut.
HG Edwards sells, installs and repairs doors and windows. The company has been in business since the 1950s and will be relocating from Summit to a new expanded showroom this October, at 1280 Springfield Ave. in New Providence. (908) 273–3224 • hgedwards.com
SEE HERE
 It never hurts to have a good pair of safety goggles in your toolbox—no pun intended. They range in price from a couple of bucks for cheap dust and splash goggles to $20 and up for models with mouth shields. For jobs involving mist or dust or chemicals that might damage your eyes, look for goggles that form a “gasket” where they contact your face.
Unless everyone in your home has perfect vision, you’ll want at least one pair that fits over eyeglasses. You’ll also want to have sizes to fit any children in the house, in case they want to “help” mommy or daddy on a project.