Stirring things up
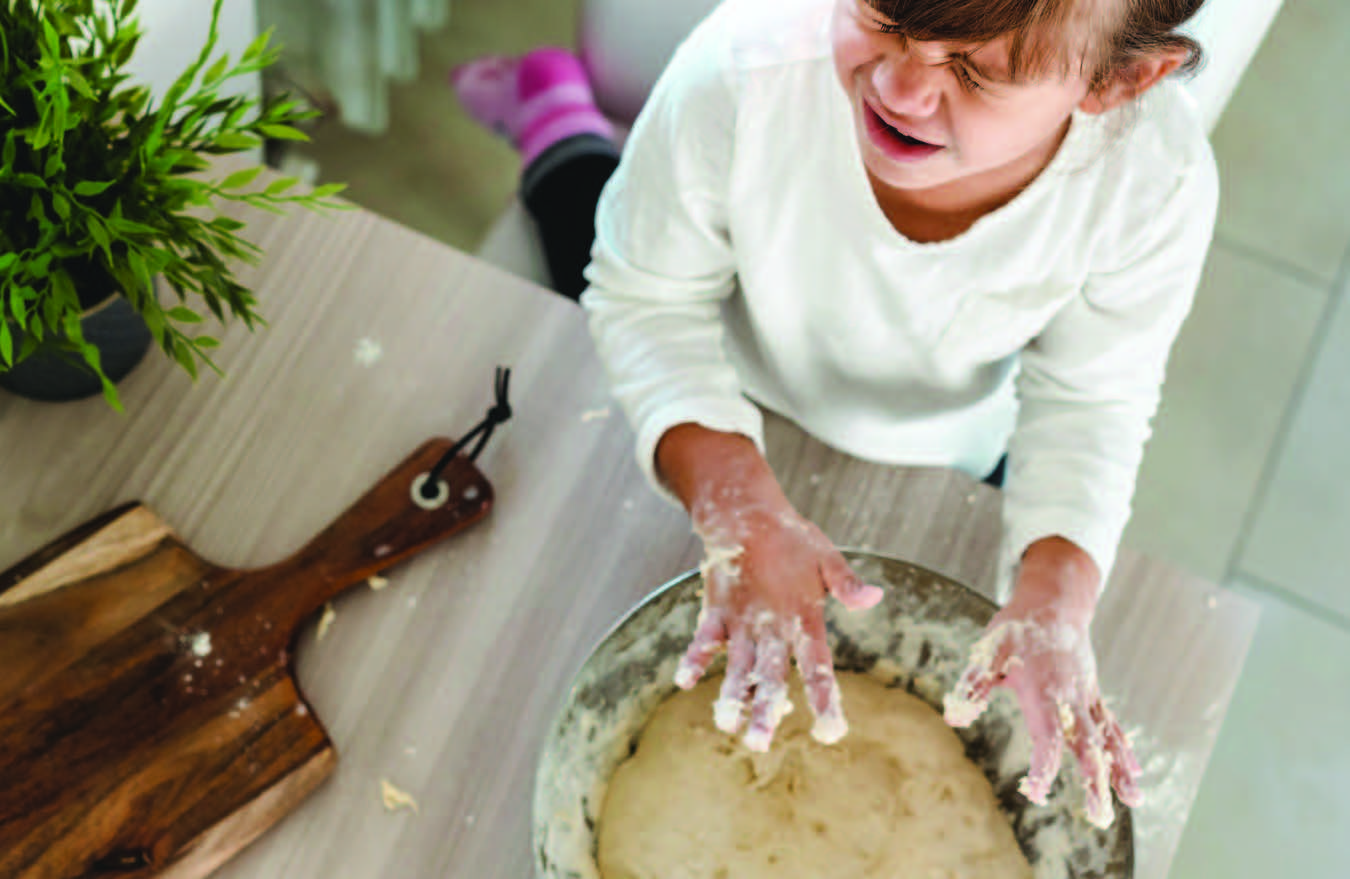
Holiday entertaining is more meaningful when kids get in on the cooking.
Enjoying time and food with friends and family is one of the true pleasures of the holiday season. For young children, it offers a chance to get to know all the grown-ups better, and also to show off how “grown-up” they themselves have become since the last holiday gathering. Whether your family is hosting a party or attending as guests, some kind of food is bound to be involved, including main courses, side dishes, appetizers, salads and desserts. Oftentimes, parents discourage their kids from helping out with party-food production, especially the younger ones. As a mom who’s been cooking with her children for a long time, I completely understand—kids can be messy, require close supervision, and you’ll have to be cautious about what they are working on.
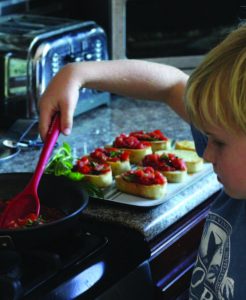
Photo by Brianne Grajkowski
But I also know that not including your children from this process is a major missed opportunity.
Cooking with your kids—or grand kids, if you have them and they are old enough—can be both fun and educational. It teaches them to be creative and explore new flavors. It teaches measurements, math, and science. It helps with reading, as kids learn new words from the recipes and lists of instructions. And when kids learn how to cook for themselves, they are also learning how to care for themselves, which is something all parents want for their children.
In addition, if they are put “in charge” of a party dish, the positive reinforcement they receive watching loved ones enjoy their creation is something that will last for a lifetime. Kids aren’t wired to be spectators; they are born participants.
With all this in mind, I gathered a handful of recipes that you can cook with your kids in the run-up to your next holiday gathering. The recipes are kid-friendly and approachable, but they aren’t “kid food.” They are small-dish appetizers that are meant to be special treats that should disappear quickly off the plate. They may even hear loud exclamations of delight and surprise: You made this? No way!…You did this by yourself? Impossible!…These are the best things at the party!

Safety First
Before we get to these party recipes, the most important thing you’ll need to keep in mind when cooking with kids is kitchen safety. I have found there are three components to cooking 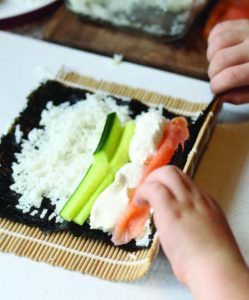 safely: Listening, Timing, and Supervision:
- Listening. I’ve always told my kids that the first rule of cooking is listening. If they are having a hard time listening, then it isn’t the best time for them to cook or help out. I will ask them to sit down at the table until they are ready to move on. I find this to be the most helpful rule while cooking and learning together so that they remain safe.
- Timing. Safe cooking is fun cooking so, as a parent, it’s your job to know when it’s a good time for you and your child to cook together. If you’re in a hurry or starving, save your cooking together for another time. You both want to be ready to learn and enjoy your time together.
- Supervision. The third rule of safe cooking with your child is knowing how and when to supervise. The three areas of the kitchen that I think need the most supervision are when using A) a real knife, B) a stand mixer and C) anything that could burn them. In these areas, I am always with them at their current level of cooking. Once you’ve watched over them several times, use your best judgment for when you feel your child is ready to use these items with minimal supervision.

Getting Started – Practice makes perfect. Cooking together can have a learning curve, so it’s a good idea to test-drive a recipe with your children days or even weeks before the big party. Don’t be discouraged if the first few attempts don’t go exactly as planned. Keep trying until you find a rhythm together. Learning at the start will be the most challenging. Here are some tips and tricks for how to begin:
Start small. A good age to start teaching kids about cooking is when they are two to four years old, when they can help with easier tasks like pouring ingredients into a bowl and stirring. Even at that age, they can claim authorship of a dish even if you ended up doing the bulk of the work. When my kids were young, I encouraged them to cook with me all the time. One of their favorite cooking tasks was using the pastry brush to “paint” olive oil onto veggies or tomato sauce onto pizza dough.
Be patient. Kids will make a mess. Also, it will take longer to cook the dish than if you were cooking on your own. That’s okay because, as your child is learning, it is important to remember to have fun.
Start simple. The five recipes in this story are best suited for kids with a little experience in the kitchen, but you can help guide them. You’ll be interested to know that they are pulled from a book of 101 recipes that was published this fall, entitled Cooking with Kids. As a rule, easy recipes have few ingredients and don’t generally involve a lot of steps or complicated tasks. Some of the recipes in this story involve either a knife, high heat, or both. You can use a kids’ knife set or do that part yourself. If you sense any fear or potential for real danger, be sure to step in, but once you demonstrate how to do something safely, I think you’ll be surprised how quickly kids pick up the skill.
Pre-read the steps. As a kitchen supervisor, review all the steps of a chosen recipe with the kids before you start. Make sure you have all the necessary ingredients, equipment and to know what to expect.
The rule of one. If you are cooking with more than one child, start one child at a time on a task. Once each has a good understanding of the steps, you can all cook together.
Lay it all out. Gather all the ingredients, tools, dishes and equipment needed for the recipe and set them out on the counter. I walk through each step with my kids before following the instructions and adjust the recipes to my family’s tastes.

Photo by Brianne Grajkowski
Bruschetta
Serves 12 • 20 minutes
Medium • This recipe involves a sharp knife and high heat
6 tbsps. olive oil
1 large baguette, cut into 1-inch slices
2 cups of cherry tomatoes
2 tbsps. garlic
1 tsp. salt
4 tbsps. basil, chopped
- Drizzle 1 tablespoon olive oil over baguette slices and toast in toaster oven or conventional oven at 350°F for 5 minutes.
- Dice cherry tomatoes into 1/4-inch pieces.
- Sautee tomatoes in 2 tablespoons olive oil and garlic for 3 minutes in a medium skillet on medium heat.
- Remove from heat.
- Add salt and basil and stir.
- Spoon oil, salt, and basil mixture onto each slice of baguette and serve.

Photo by Brianne Grajkowski
Roasted Garlic Hummus
Serves 12 • 40 minutes
Medium • This recipe involves a knife and high heat
2 heads of garlic
6 tbsps. olive oil
2 tsps. + sprinkle salt
2 lemon
Two 15-oz. cans of garbanzo beans
4-6 tbsps. water
- Preheat toaster oven to 350°F.
- Peel outer layer of garlic off. Slice tips off.
- Place garlic on toaster oven tray. Drizzle with 1 tablespoon of olive oil and add a sprinkle of salt.
- Bake for 30 minutes.
- Let garlic cool, then squeeze the garlic cloves out of their skins, pushing from the bottom up. Set a few pieces of garlic aside for garnish.
- Slice lemon in half and use a lemon squeezer to pour juice into the blender.
- Pour garbanzo beans and remaining olive oil, salt, and garlic, then the water, into blender.
- Pulse until smooth. Scrape into a dish using a spatula or wooden spoon.
PUSH!
Push your thumbs from the bottom of the garlic up to get all of the cloves out.

Elote Deviled Eggs
Serves 12 • 30 minutes
Hard • This recipe involves a knife and high heat
24 eggs
2/3 cup mayo
2 tbsps. mustard
1/2 tsp. salt
1/2 cup frozen mixed corn
4 tsps. elote seasoning or 2 tbsp. chili powder
- Add eggs to pot and fill with water until it reaches 1 inch above eggs.
- Let water boil, then remove the pot of eggs from heat and let stand for 13 minutes.
- Drain eggs and run cool water over them.
- Peel eggs and slice in half.
- Mix egg yolks, mayo, mustard, and salt in a bowl or directly in a ziplock bag.
- Cut the tip of the bag and pipe the filling into the egg halves.
- Defrost corn in the microwave, then toast for 1 to 2 minutes in the toaster oven or skillet.
- Sprinkle eggs with corn and elote seasoning and serve.
PIPE!
Using a ziplock bag makes it easy to pipe the filling into the eggs!

Photo by Brianne Grajkowski
Philly Rolls
Serves 8 • 15 minutes
Hard • This recipe involves a knife
1 large English cucumber
8 sheets seaweed
2 cups cooked rice
8 oz. cream cheese
8 oz. smoked salmon
- Slice cucumber into sticks. Cut lengthwise in half until you have 1/4-inch sticks.
- Lay out a sheet of seaweed on bamboo sushi mat or cutting board. Press 1/4 cup of rice into sheet.
- Add cream cheese, salmon, and cucumber to the middle of the rice-topped seaweed. Make sure ingredients are evenly laid out in the middle, from left to right.
- Roll from the bottom up with your bamboo sushi mat, or use your fingers to tightly roll until edges of the seaweed meet.
- Slice into 1/2-inch pieces.
- Repeat for remaining rolls.
ROLL!
Roll the seaweed sheets from the bottom up and squeeze tight!

Photo by Brianne Grajkowski
Shrimp Skewers
Serves 8 • 30 minutes
Medium • This recipe involves high heat
Two 32-oz. bags of frozen shrimp
2 tsps. granulated garlic
1/2 tsp. pepper
1/2 tsp. cumin
1/2 tsp. chili powder
2 pinches of salt
1/2 cup butter, melted
- Defrost shrimp in a strainer set in a bowl of cold water.
- Add all seasoning into a large bowl.
- Pour in melted butter and stir.
- Add in defrosted shrimp and stir.
- Add 4 to 6 shrimps onto a bamboo skewer, so they lay flat.
- Grill at 300°F for 2 to 3 minutes per side.
STRAIN!
Use a strainer to defrost the shrimp. That way, the shrimp can be pulled right out of the water and poured into the seasonings.
A final thought: Having a hand in making food for a big group of family and friends is a great way to get picky eaters to try foods they might otherwise not. Normally, if a recipe has an item my child doesn’t typically like, I give it a try anyway. Sometimes, they will enjoy a particular food cooked a different way. You can also substitute ingredients if needed. But feel free to do what works and make it fun.
Editor’s Note: Brianne Grajkowski is a popular food and lifestyle blogger, and author of just-released Cooking with Kids (Fox Chapel Publishing), which features 101 easy recipes. A mother of two known for