Building a Backyard Observatory
By Christine Gibbs
On August 21, 2017, millions of New Jerseyans turned their collective attention toward the heavens to sneak a peek at a dramatic partial eclipse. For 160 seconds, they experienced the thrill and wonder that the state’s amateur astronomers feel every night. Over the last 20 years, this legion of stargazers has fueled a growing movement to reconnect with the universe through backyard observatories. Thanks to the publicity surrounding the summer eclipse, their numbers should rise sharply between now and the next significant eclipse in the U.S., which is due in 2024. What these newbies will quickly discover is that a backyard observatory offers more than just a window into the heavens. It is a unique way to unplug from the sensory barrage that has become our everyday life.
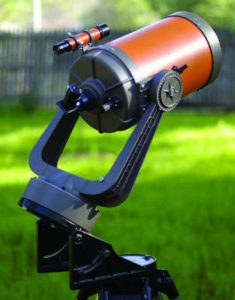
Photo courtesy of Opoterser
Perhaps the first thing to know is that backyard astronomy has taken a giant leap since the $50 telescopes of our youth. Today’s entry-level devices are far stronger and more sophisticated. And just to be clear, when you talk about the power of a telescope, understand that you are talking about its ability to gather light. It’s not a giant magnifying glass.
Before opening your wallet, it’s a good idea to walk before you run. If you already have some knowledge of the night sky, or at least a healthy curiosity, that’s great. Can you identify a constellation other than the Big Dipper? Can you tell a planet from a star? If not, train your naked eye (with the help of binoculars) to recognize these things before you train a telescope on them. Next, locate an astronomy club near you. There are more than a dozen in the state. Start with the United Astronomy Clubs of New Jersey (uacnj.org), which will point you in the right direction. The organization also has an observatory set-up in Warren County you can visit. You don’t have to join a club right off—most are happy to let you dip a toe before coughing up dues. “Star parties” are a good opportunity to learn what kind of equipment is right for you, and to quiz others who have invested in a home observatory. Finally, spring for a subscription to Sky & Telescope magazine—either online or hardcopy—to get a feel for what others in the hobby are talking about, and also to peruse the ads.
CHOICES, CHOICES
At this point, you will have become acquainted with three different types of telescopes: Newtonian Reflector, SCT and Refractor. Refractors are what most people picture when they think of a telescope. Light enters through a lens at one end and is focused by the eyepiece at the other end. Top-of-the-line refractors are fantastic, but can be extremely expensive. Newtonian Reflectors (yes, Isaac Newton is credited as the inventor) collect light at the bottom end of the tube and reflects it back toward the eyepiece at the top, using a large parabolic mirror and a second, smaller mirror. Newtonian telescopes offer great bang for the buck, tend to be bulky as they get more powerful, and also require frequent realignment of the mirrors. SCT (which stands for Schmidt-Cassegrain Telescopes) models combine lenses and mirrors, which enables the telescopes to be fairly compact. Another appealing feature of SCT’s is that they can be manipulated through a laptop. The downside is that the sharpness of the images you’ll see may fall a bit short of the other two types. A very good entry-level telescope will run you $500 and up, depending on the type.
 Also, for many amateur astronomers, size really does matter. Lugging around a huge telescope—even from your garage to your patio—gets old fast for most people. Which is why, when it comes time to invest in a really good telescope, the conversation (and budget) includes construction of a backyard observatory.
What kind of observatory would work for you? There is a profusion of examples out there, ranging from the rudimentary to the monumental. It all depends on the degree of investment you’re willing to make—physically and financially. Most experienced astro aficianados agree that an important early decision is to select between a roll-back roof model or a more sturdy wind-proof dome. Other considerations involve the size and location of viewing windows and rotation capabilities. To move ahead with your project, you must also honestly assess how much of your well-tended earthly garden you are willing to sacrifice for a better view of what lies above.
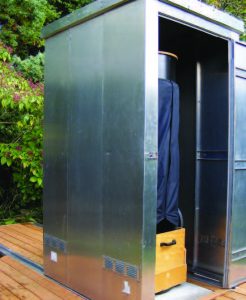
Most amateur astronomers take their initial plunge with a simple structure that is really no more than a shed with a retractable roof. Thumb through astronomy magazines a century old and you’ll find how-to designs for this type of observational platform. If you’ve got the time, the lumber and the skills, you can easily build one yourself. There are also a number of vented, climate-controlled structures commercially available, including the aptly named Astrocloset (left), which looks a bit like an aluminum meat smoker. All are simpler, less-expensive alternatives to full-scale backyard observatories that can be set on a deck, patio or basic concrete slab. Typically they are no bigger than 5’ x 5’. They start in price around$2,000, plus shipping costs, and most require more than a little assembly.
Traditional domed observatories range from small, budget models to sky’s-the-limit structures that can run $100,000 or more. The main advantage of a dome (beside the fact that it looks cool) is its ability to rotate its opening to follow the stars as they move across the sky, shielding the telescope from stray light and wind. The size of the dome correlates to the size of the telescope and the size of the astronomer. Most are motorized. Decent, entry-level domed observatories (from companies such as NexDome, Skyshed and ExploraDome) are made of lightweight materials and come shipped in modular pieces. They run $3,000 to $5,000 plus construction cost and accessories. There are less expensive options, but the cheaper the price tag, the less sturdy and more problematic they tend to be.
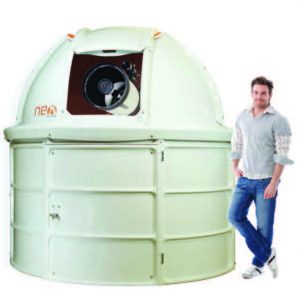
Photo courtesy of NexDome
WE ARE NOT ALONE
For those interested in building their own backyard observatories, there is a community of do-it-yourselfers and legitimate engineers offering online advice and instructions. Some, like rocketroberts.com, actually document the project from start to finish. Regardless of the scope of the decision to build, there is widespread agreement on the factors to consider before taking that big step forward. One such astro neophyte was Tim Hunter, who—through painful personal experience—compiled a list of 8 Backyard Observatory Mistakes to Avoid:
Location, Location, Location
The observatory can never be too close to your back door if convenience was the inspiration in the first place.
Hot Topics
Beware of concrete, bricks, asphalt walkways and black-top paved parking lots that absorb and radiate heat that interferes with telescopic performance.
Money Matters
You can depend on cost overruns, so prepare your budget “realistically”…and then double or triple it!
Follow the Rules
Be sure to check out local zoning and permitting regulations related to construction sites, lighting ordinances, etc., to avoid fines and, in extreme cases, having to dismantle.
Power Play
Outlets, outlets everywhere and then some extra. You can never have enough well-placed electrical wiring to conveniently service all your valuable equipment.
Peace of Mind
Make security a priority. Think high fences, high-tech motion detectors, and the like, and then sign up for a backup insurance policy just in case.
Unwelcome Visitors
Your observatory can be quickly compromised by a host of invaders of the vermin variety to include wasps, rats, squirrels and others. Regular inspections can help to avoid serious damage to equipment and the structure itself.
What else is new?
It is only a matter of time that practically everything in your observatory will be updated, upgraded, or destined for the Smithsonian. Make sure an ongoing budget is prepared for the inevitable.
www.istockphoto.com
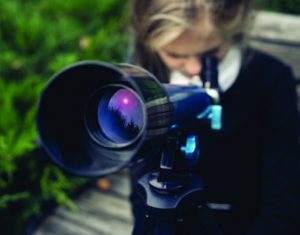
FAMILY MATTERS
For most parents, getting their kids (and, yes, themselves) unplugged and together in a group activity is a constant challenge. Backyard astronomy is a great way to get everyone out of the house, enjoying science and sharing the spirit of discovery. It’s also a wonderful way to engage with history. Written records of astronomical observers date back to 1600 B.C. in Babylonia, but prehistoric sites such as Stonehenge—which functioned as an enormous celestial/lunar tracking device—tell us that families have been pondering the mysteries of the skies for countless millennia.
LOOK! UP IN THE SKY!
According to SeasSky.org, these are some of the celestial highlights for New Jersey backyard astronomers in 2018:
January 3-4 January 31
Quadrantids Meteor Shower.
Full moon, blue moon and supermoon
May 9
Jupiter closest to Earth and fully illuminated by the sun.
June 27
Saturn closest to Earth and fully illuminated by the sun.
July 27
Mars closest to Earth and fully illuminated by the sun.
August 17
Best view of Venus—low in the western sky right after sunset.
September 7
Neptune closest to Earth and fully illuminated by the sun.
October 23
Uranus closest to Earth and fully illuminated by the sun.
November 6
Best view of Mercury—low in the western sky right after sunset
December 13-14
Geminids Meteor Shower—the best of the year.